OAuth Access Control
For VMware Carbon Black Cloud™ customers who use VMware Cloud Services Platform for Identity and Access Management, API access is controlled using OAuth apps or User API Tokens. This is currently limited to the UK Point of Presence.
CSP OAuth App flow
OAuth Apps are created for a CSP Organization and given a service role for the VMware service with which they will be used. For CBC, the process to create and link Oauth Apps is described below.
Create a Custom Role
A standard role can be selected, but to enforce the principle of granting least privilege, a custom role containing only permissions needed by the OAuth App should be created.
a) In the VMware Cloud Services portal under Identity & Access Management go to the Roles page.
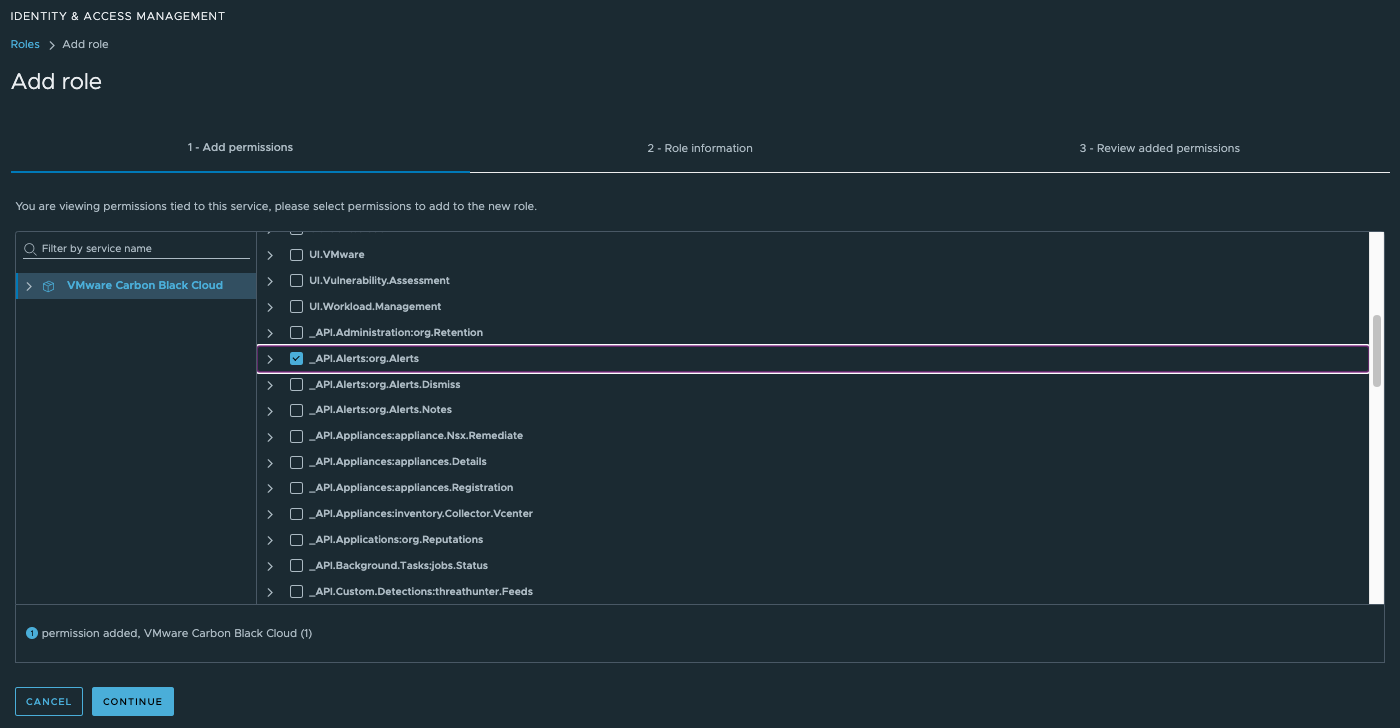
b) On the Roles page, click Add Role.
c) On the Add permissions step of the wizard, using the permissions that begin with _API
select the combination of permissions for the new custom role.
-
Clicking a service name in the left pane displays all service roles permissions in the right pane. Use the check boxes to select the individual permissions that you want to add to the new custom role.
-
If you are using the integrationServices/v3 APIs you will need an OAuth app with the equivalent permissions of an API Key with Access Level type SIEM or API. Create a custom role with the permission of either
_ConnectorType.SIEMor_ConnectorType.APIto match the Access Level type required by the API call.
d) Click Continue.
e) Type a name and description for the new custom role.
f) On the last step, review the list of permissions you added to the new custom role, then click Save.
Create OAuth app in CSP
a) On the left menu select Organization > OAuth Apps
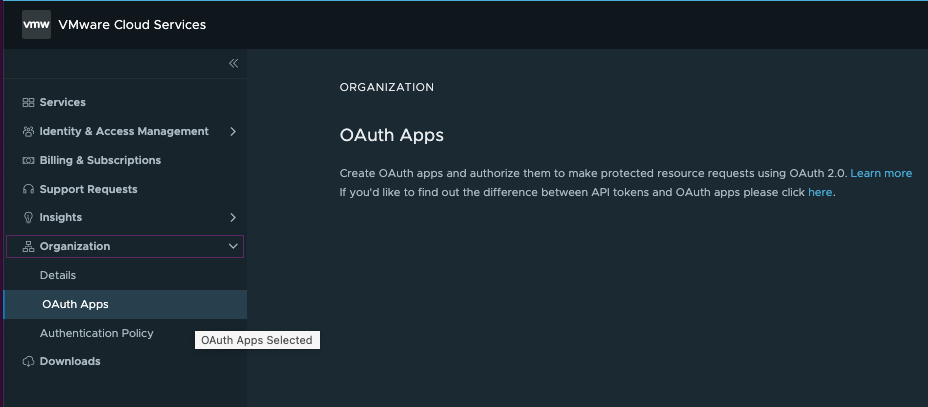
When the Organization Details open, there will be a section for OAuth Apps.

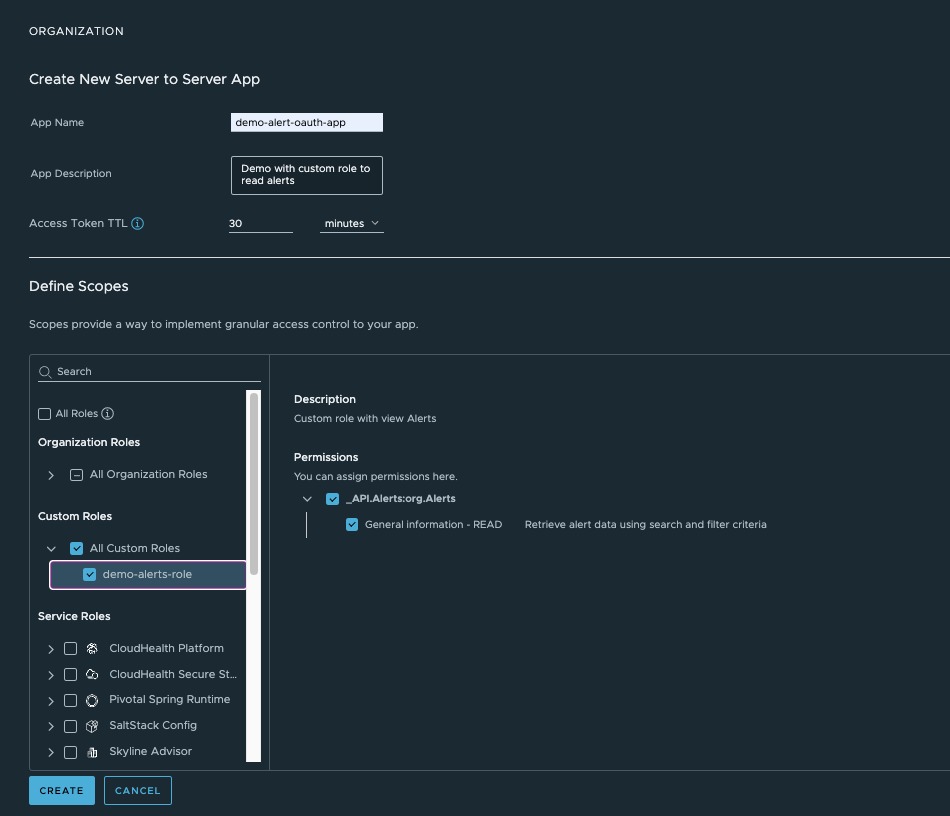
b) Click on the CREATE APP button. Select Server to server app then Continue. This type of app works best when using a backend app or script to perform the authentication workflow.
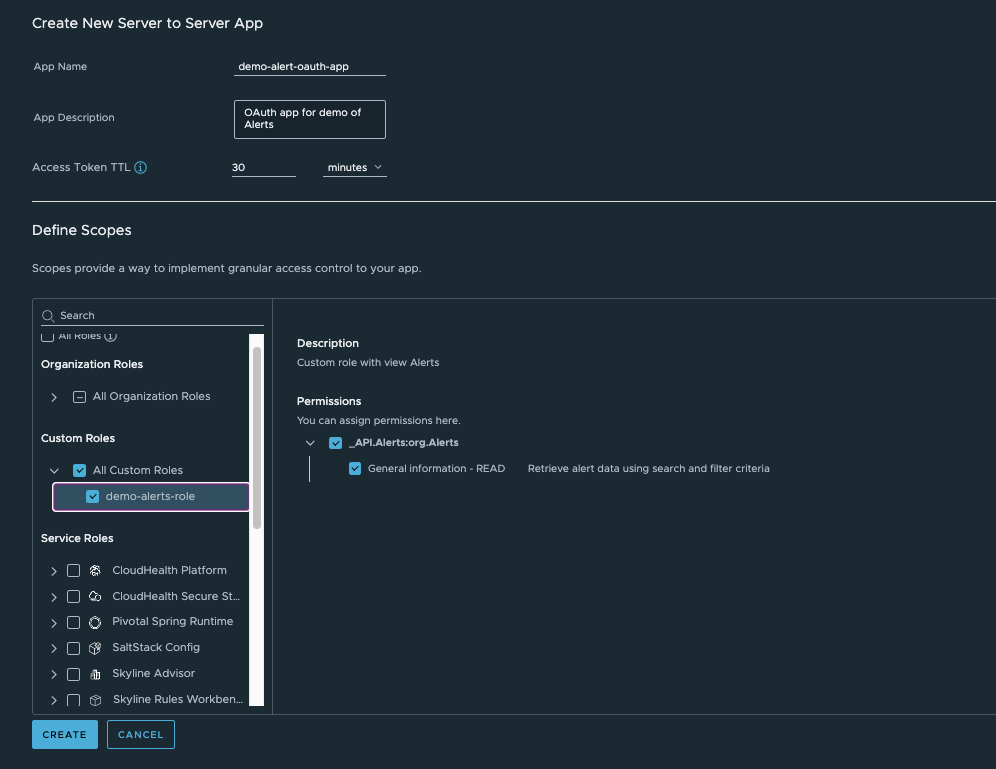
c) Give the app a name and description, and set the Access Token TTL (Time To Live). The default time is set to 30 minutes, which is recommended for security.
d) Choose the required CSP Organization Roles, Custom Roles and Service Roles for the app.
-
Organization Rolesare CSP-specific roles, and most cases will use eitherOrganization MemberorOrganization Owner.- The
Organization Ownerrole provides access to additional CSP administrative actions; however, CSP Organization roles do not impact service roles or permissions.
- The
-
For the
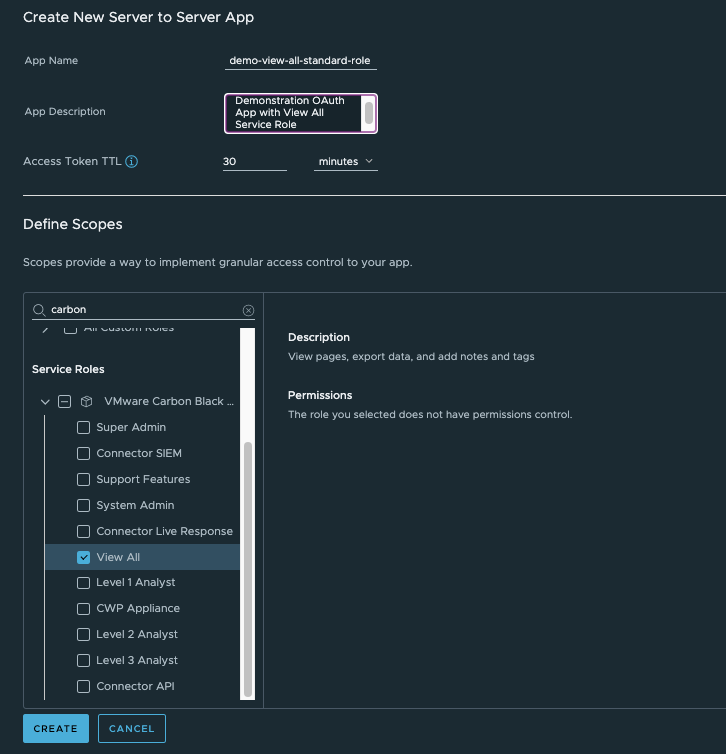
Service RolesorCustom Roles, search for the name of your Carbon Black Cloud service and select the roles you want to use with the OAuth App. -
Click the
CREATEbutton when ready.
Selecting a Service Role:
Selecting a Custom Role:
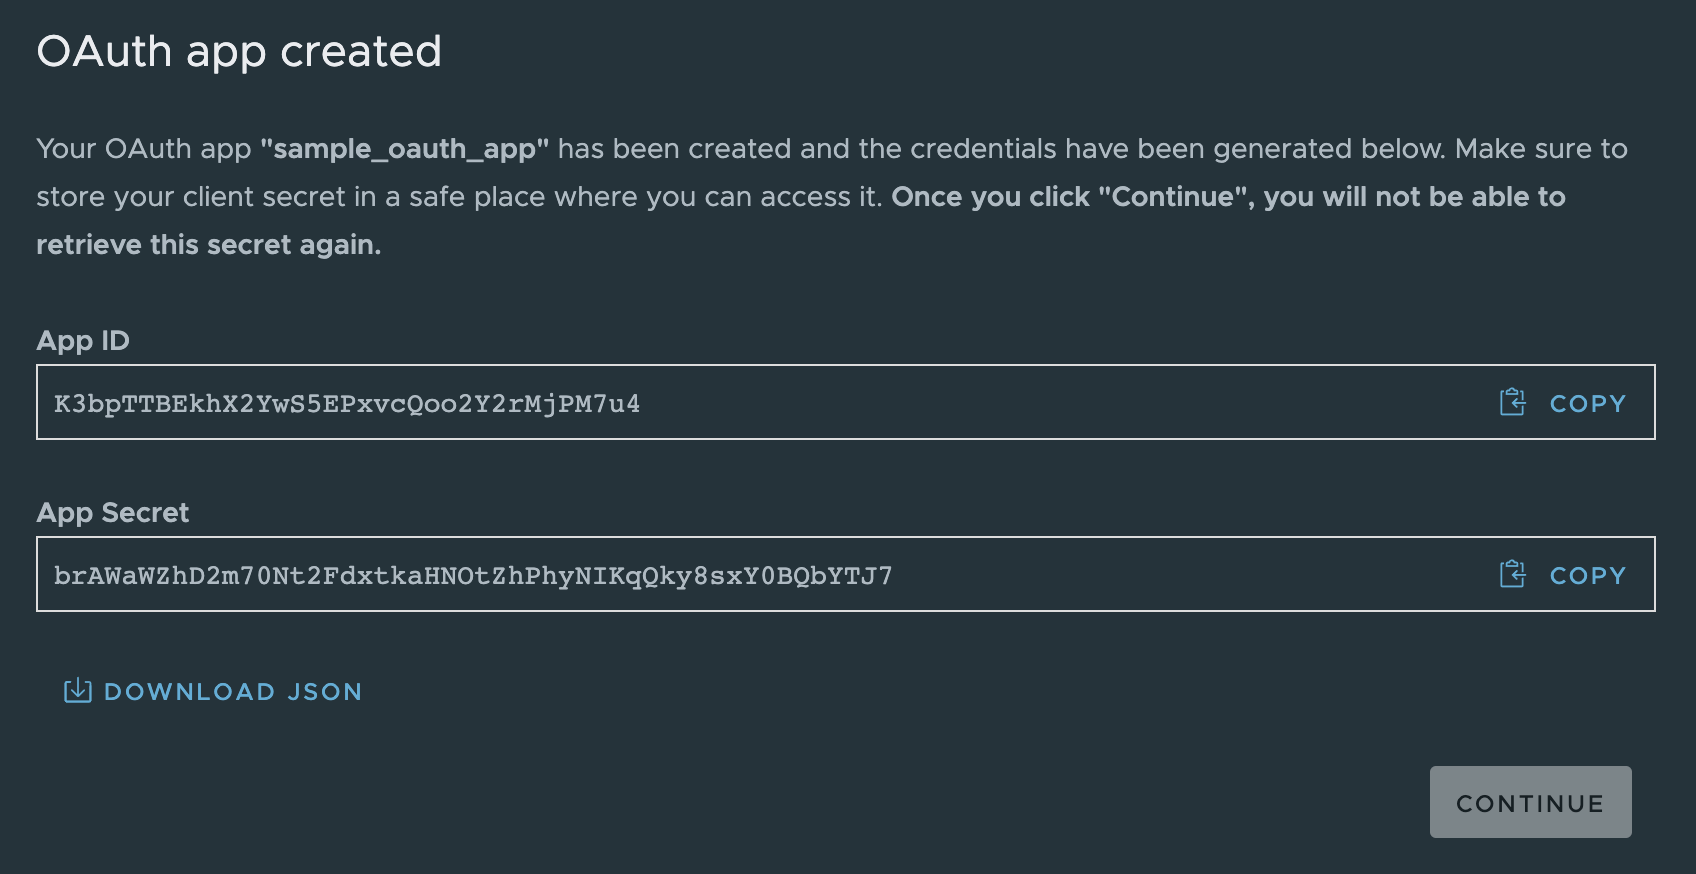
e) A pair of OAuth App Id and OAuth App Secret values will be generated.
Copy and securely store these values. These values can be used to create an ‘Access token’ in CSP. The access token is a JWT token that has a TTL value based on what is set in the OAuth App when created and is tied to the roles that were set for the Oauth App.
At this stage you will be prompted to add the OAuth Key to the Organization. Typically you will
want to select yes, which will add the key to the currently selected organization.
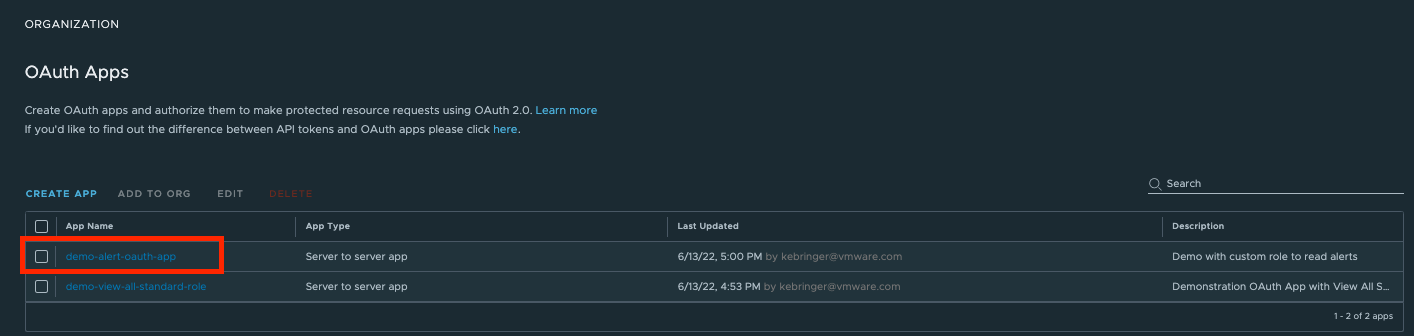
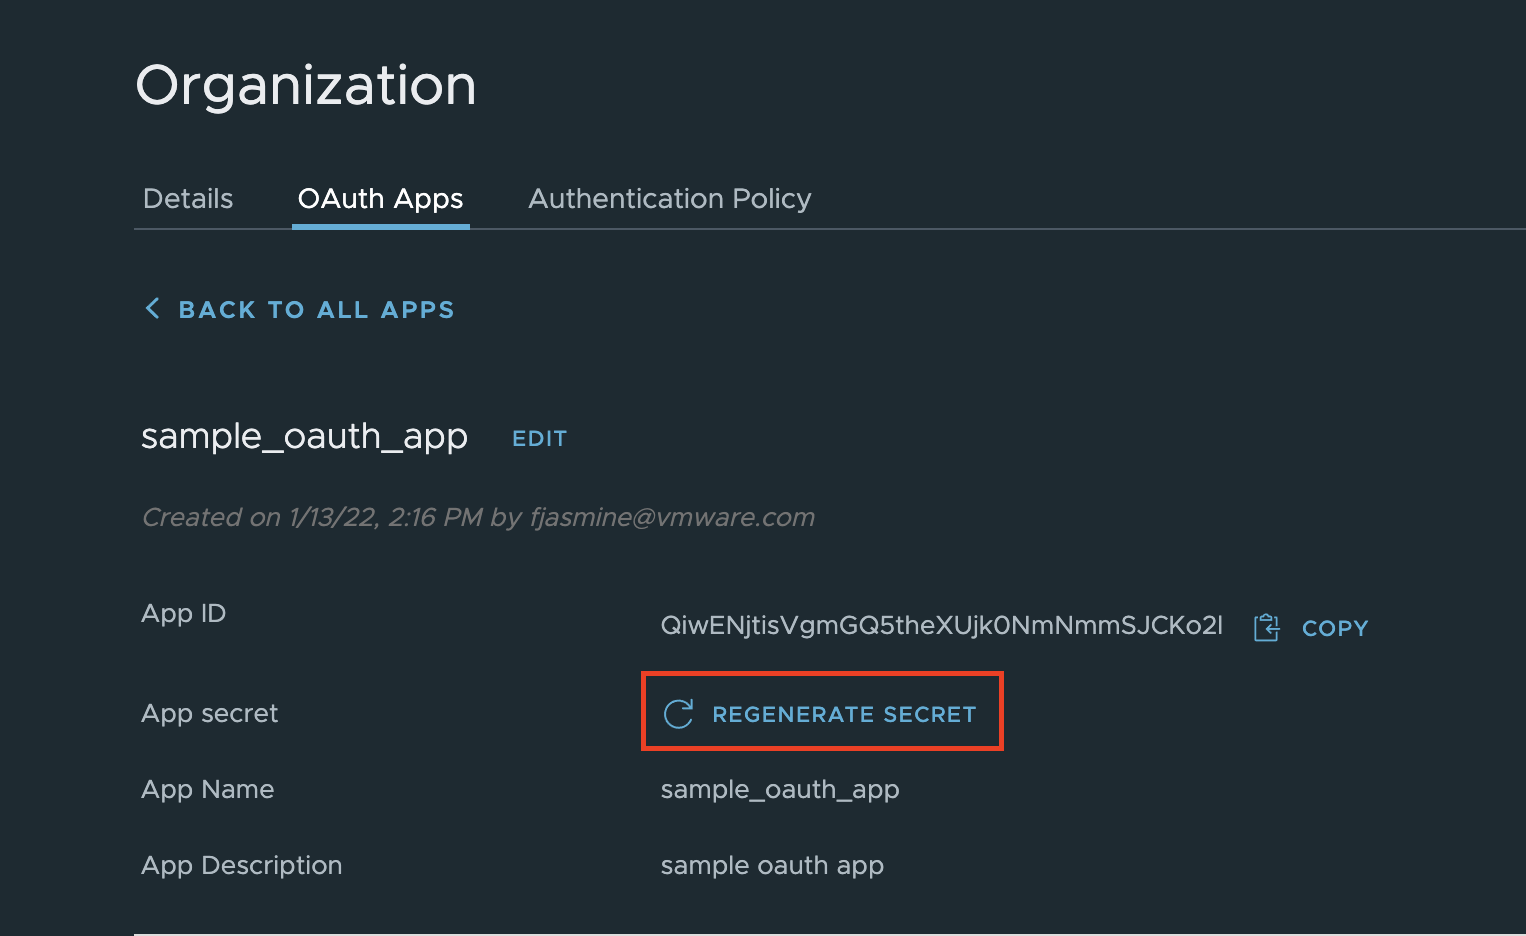
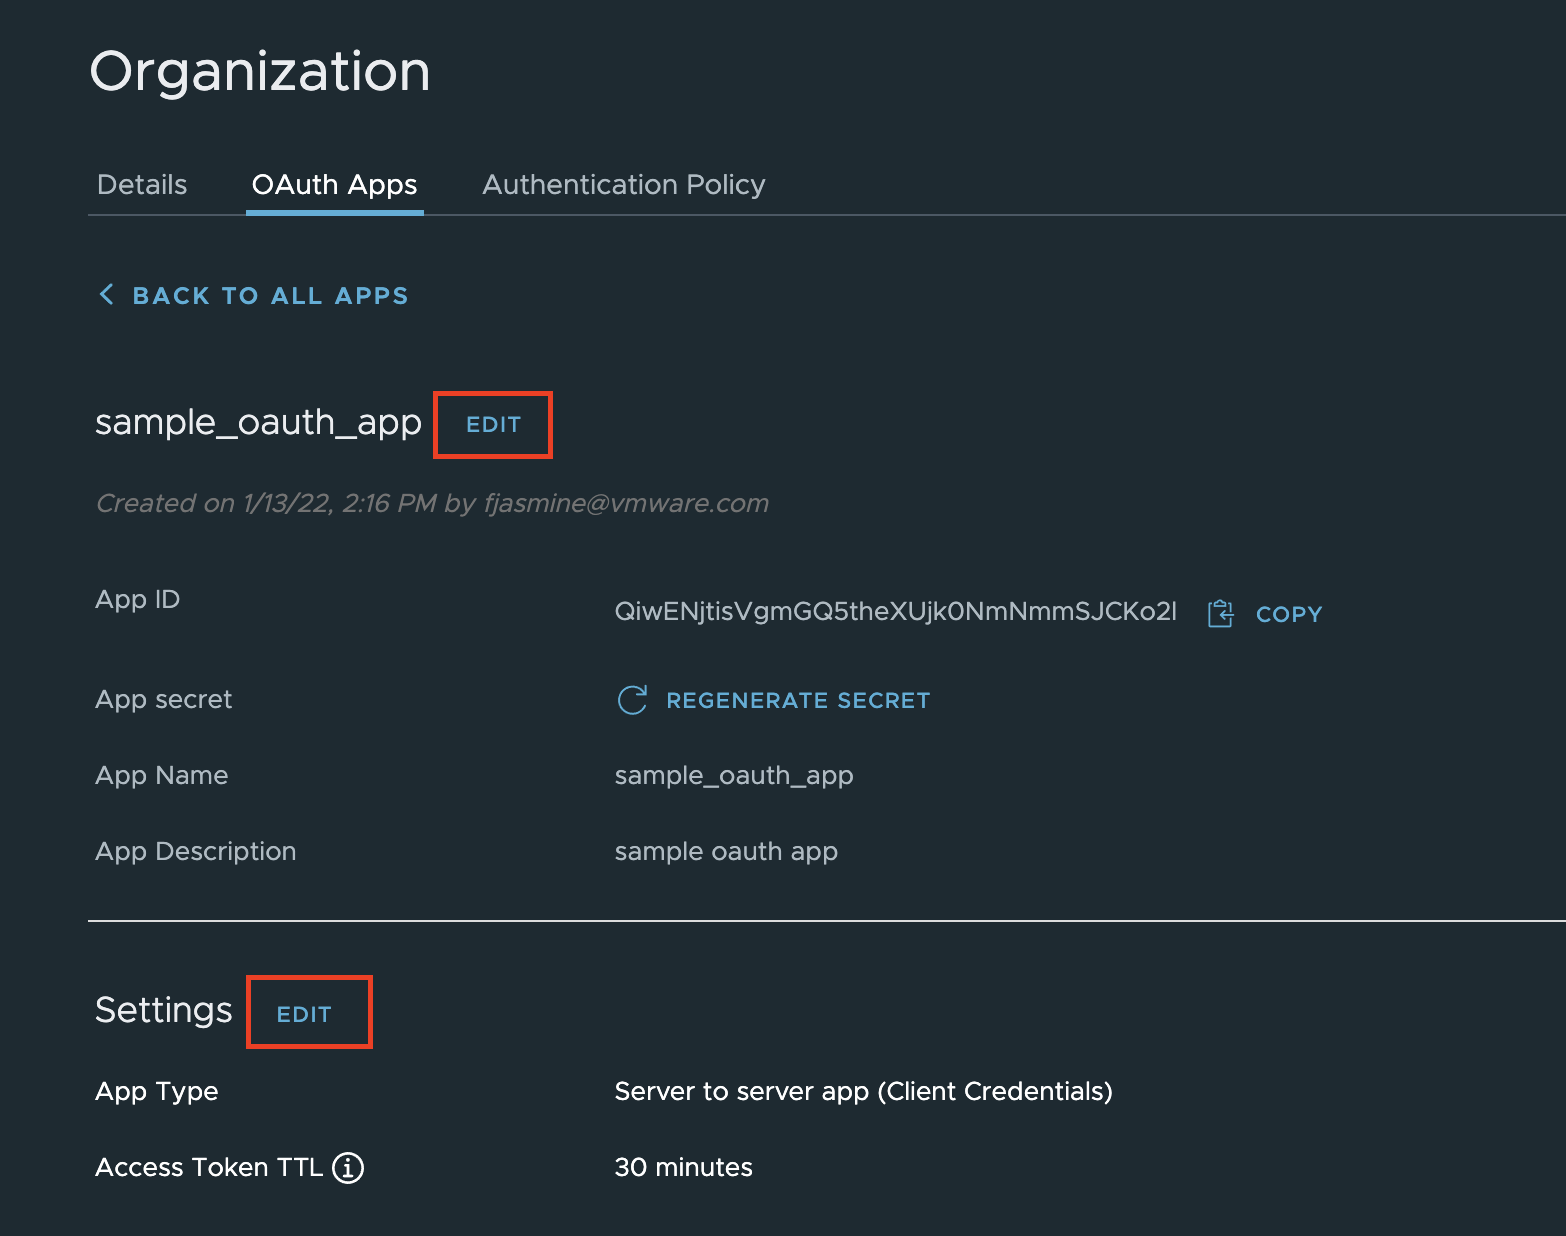
To generate a new secret, select the app from the list and click “REGENERATE SECRET”.
Any of the app details can be edited after creation by selecting the app from the list and clicking edit for the section you would like to change.
Generate Access token
Obtain an access token using the OAuth App credentials to call the CSP Gateway API.
curl --request POST '{csp-hostname}/csp/gateway/am/api/auth/token' \
--header 'Authorization: Basic {base64(App ID:App Secret)}' \
--header 'Content-Type: application/x-www-form-urlencoded' \
--data-urlencode 'grant_type=client_credentials'
In the Authorization header, the input requires a base64 encoded version of the App ID and App Secret separated by a colon.
In Linux environments, you can encode to Base64 format using the command line echo -n '<app_id:app_secret>' | base64.
Replace base64({App ID:App Secret}) in the template above with the result of that command line.
Example: Authorization: Basic YWJjZGVmZ2hpamtsbW4xMjM0NTY3ODkwOmFiY2RlZmcxMjM0NQ==
The obtained Access token will be in JWT format in the access_token field of the response body. Additionally, the expires_in field of the response represents how much time in seconds the obtained token has until it becomes invalid.
Call CBC API endpoints
Carbon Black Cloud APIs can now be called with bearer authorization and the access token previously generated.
curl --request GET '{cbc-hostname}/appservices/v6/orgs/{org_key}/devices/{device_id}' \
--header 'Authorization: Bearer {csp-generated-access-token}' \
--header 'Content-Type: application/json'
In order to support backwards compatibility and a common authentication mechanism with organizations that use Carbon Black Cloud to manage APIs, they can also be called with an X-Auth-Token using the App Id and App Secret in place of the API Id and API Key.
curl --request GET '{cbc-hostname}/appservices/v6/orgs/{org_key}/devices/{device_id}' \
--header 'X-Auth-Token: {App Secret}/{App Id}' \
--header 'Content-Type: application/json'
Last modified on February 7, 2023